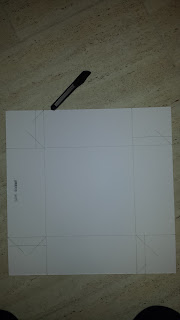
The game board design was split into four sections in Adobe Photoshop before print. These sections were then dilated using the Xnormal plugin. This was to assure that the paper would fold around the cardboard and match up perfectly to the board section next to it. For the game board I cut out the square sections of card before sticking the board design down using spray mount.
The design for the box net only included the lid for the box. This presented me with the problem of measuring and drawing out the underside of the box. I needed this underside to be very slightly smaller, allowing the lid to slide over the top of it. Measuring the lid and removing the thickness of the card x2 gave me the value that I needed. Using the metal ruler and a pencil I drew out the underside box net, cutting it out using a craft knife and metal ruler on a cutting board. The box was then constructed and fixed with superglue.
Having stuck the game board sections to compressed cardboard using spray mount, I was now left with the task of folding and fixing the flaps of paper around the cardboard. The flaps were fixed using superglue as spray mounts adhesion shows too much flexibility for this job.
Being printed on glossy stock I was worried about the ink smudging during the use of the game board. To remedy this I decided to laminate the sections of the game board. I cut the laminating plastic to size and carefully applied it over the top of the glossy paper, folding it over the edges of the card as I had done with the paper.
Finally the task of building a mechanism that would allow the game board to fold was at hand. This took some very careful planning and consideration as the game board needed to fold up neatly whilst having the sections line up when the board was unfolded. First I cut out a square piece of mat stock, slightly smaller than all the sections combined. This paper then had a slit cut from one edge to the center, having one section of the board glued in one corner. another section of the board was placed over the glued section of the board having the paper fold over the top, the paper was then fixed to this board with superglue. This process was necessary to ensure that the board folded correctly. The other two sections of the board were then simply super glued to the remaining spaces on the square paper, making sure that they lined up with the other sections.
In conclusion I believe that the process went smoothly however their was a slight miscalculation when fitting the board into the packaging. I had not considered the slight increase in the size of the game board from folding the paper over the cardboard sections. This meant that the folded game board was mere millimeters too large to fit into the underside of the box. The finished product looks appealing and works well for the purpose that it was intended.


No comments:
Post a Comment