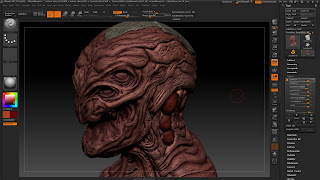
To start this project I loaded Zbrush, loading the supplied tool into the document. Saving files in Zbrush can be a bit confusing but it is a good idea to save out a project file and a toll file for your work. Project files will save your tool in the state that you left it in, meaning that all of the layers you have created remain saved and the mesh will automatically load into the document.

Filling all objects with a base colour really gets you off to a flying start. I decided to fill the objects with dark colours because I intended to dry brush(cavity mask) the model, this would accentuate all of the details produced in the sculpt. Key areas on the sculpt were then painted a block colour, ready for a dry brush pass.
It is worth noting that there is a layer system in Zbrush that works very much like Photoshop. This can be a great addition to your workflow, allowing you to reduce the opacity of a certain section in the poly paint. Creating a new layer I selected a lighter skin tone, adding highlights to key areas on the model. With this in a separate layer you can tone it down with opacity if the highlights seem too harsh.
Deciding that the alien head should have some more detailed areas to its physiology, these sections at the back of the neck were painted dark purple. This was all done in a new layer, encase I changed my mind about the idea later in the poly paint process. This was then dry brushed with a lighter colour in order to bring out the detail of the sculpt.
Once the dry brush pass was complete, I selected a lighter colour still. This was to be used as a highlight colour, moving in to the key areas and painting highlights. Again this was completed on a separate layer, giving me the option to tone down the highlights with the opacity slider.
The purple section at the back of the sculpt seemed a little too isolated and did not blend well with the texture as a whole. To remedy this I introduced similar colours to the characters mouth and neck, using the same dry brush and highlight techniques. It is also worth noting that there is an intensity slider for your brush, much like the Photoshop opacity slider. This slider gives you considerable control over your poly paint, allowing you to build up detail.
Nearly at a completion point I decided that more highlights of a slightly different skin tone were needed. Creating a new layer and using the cavity mask tool, I moved in and painted these more detailed highlights with a low intensity value in order to build up the detail.
The characters teeth were also painted using a dry brush technique. With a low intensity value I built up the colour at the tip of the tooth allowing it to gradually fade as it gets to the base of the tooth. I believe that this quite successfully emulates the look of decaying teeth.
Once complete all layers must be baked onto the model, ensuring that all vertex colour information is exported in the obj. file format.
It is worth noting that each sub-tool must be exported separately. In a character model built for animation, assets such as teeth and eyes would be skinned separately anyway. Try to use clear naming conventions for your assets, allowing other people to understand your work. It also speeds up your workflow as you immediately know which asset you are looking at in the file system.
Making sure that the low poly model has soft normals. This is because the normal map applied later supplies all of the normal detail that the model will need. Export the low poly model as an obj. file and create an envelope asset that should also be exported.
There are many ways to bake your maps from your high poly model, I find Xnormal to be among the most efficient. Setup for this process is pretty self explanatory, just insert the meshes into the correct sections, select the maps you wish to bake and hit bake. Obviously better results can be observed by changing the baking options. Remember to un-check the ignore vertex colours option on the high poly mesh inserts.

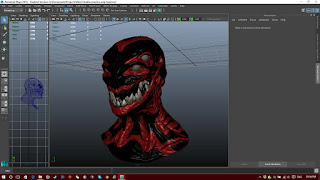
If you do not bake the Zbrush layers into the mesh before exporting obj. you may see an error such as this. This is because not all of the vcol information was saved out into the obj. file.
Once the maps are baked they can be applied to the model in Maya. A new material is created and named, with the maps being attached to the shader in the correct slots. At this point only the diffuse, normal and ambient occlusion maps have been created. I then went on to create the specular map in Adobe Photoshop, ensuring that the specular highlights appear in the correct locations and at the correct intensity on the model.
Opening up the vcol map in Adobe Photoshop will allow you to make any amendments that you wish, the main reason that I did this was to use the information in order to create a specular map.
First a hue and saturation adjustment layer was added, having all of the saturation in the layers below it removed. This is a good way of removing saturation from an image because it does not damage any of the colour information on the original layer.
Another adjustment layer was added in order to alter the levels in the image. Increasing contrast between light and dark values. This gave me an apropriate base to work with when editing the specular map.
Painting with a dark colour and the layer style set to multiply allowed me to reduce the white values in specific areas. Using this method meant that I could erase or correct any mistakes made without effecting the original image.
Painting a lighter colour on a new layer with a vivid light setting gave me the ability to increase the white values in certain areas of the image. I thought about the different sections of the character, which areas would be glossy, such as around the eyes. These are the areas that should display lighter values.


No comments:
Post a Comment